Summary notebooks implementing derivative gaussian processes with tinygp. Building from the tinygp tutorial on Derivative Observations & Pytree Data, we implement a 2D derivative gaussian process, perform SVI with 1D derivative gaussian processes, and perform SVI using 2D derivative gaussian processes.
Note: The first three notebooks are instructional. The latter two are inefficient and unrefined. But, they were added anyways for reference. Better versions of those two notebooks may be added in the future.
Notebooks
01_1d_deriv_gp.ipynb: 1D Derivative Gaussian Process
02_2d_deriv_gp.ipynb: 2D Derivative Gaussian Process (Bonus: Polar GP Implementation)
03_svi_1d_deriv_gp.ipynb: SVI with 1D Derivative Gaussian Process Prior
04_svi_2d_deriv_gp.ipynb: SVI with 2D Derivative Gaussian Process Prior (Cartesian GP, Polar GP)
05_svi_2d_sparse_deriv_gp.ipynb: SVI with 2D Sparse Derivative Gaussian Process Prior (Cartesian GP)
Installation
Run the environment.yml file by running the following command on the main repo directory:
conda env create
The installation works for conda==4.12.0. This will install all packages needed to run the code on a CPU with jupyter.
If you want to run this code with a CUDA GPU, you will need to download the appropriate jaxlib==0.4.13 version. For example, for my GPU running on CUDA==12.3, I would run:
pip install jaxlib==0.4.13+cuda12.cudnn89
The key to using this code directly would be to retain the jax and jaxlib versions.
This application is a “ready to go” project aiming to simplify your experience with the – amazing – IdentityServer of Dominick Baier and Brock Allen.
There are two main points that differs from the original templates already kindly available and that we’ll discuss here. The first one is to offer persitency to your configuration through database storage. Instead of only writting your configuration in the good old “Config.cs” you will also have the possibility to manage it in a SQL-server database instance through a UI. A User store based on Identity Framework is also provided with basical authentication services, aka Registration, Sign in, Email Confirmation, and Password Reset. No mail service here though, so you’ll have to implement it yourself.
The second main topic here is the UI. API scopes, Identity Resources, Clients, Users, and Roles are all manageable through a built-in interface, secured with Identity Framework and documented with the definitions available on the Official Documentation.
Interested? Let’s dig right in.
Installation
To begin with, you’ll have to clone this project.
Choose your location of choice on your local machine, and type:
And here we go, just like that our stores are ready to be used.
3 – Let’s plant some seeds 🌱
The application is design to enable a default basic seeding of Configuration, Users and Roles.
In order to use it, all you have to do is to launch your project with specific parameters. If you dig a little bit in the “Program.cs”, you’ll see those three lines of code:
Pretty clear in terms of arguments, right?
So Right click on your project, go to Properties > Debug and let’s start with the Roles:
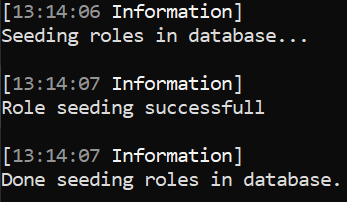
Start the project, and you should see a terminal with those informations written:
Repeat the operation with the the seedUsers and seedConfig, the terminal should open again with validations messages.
4 – Additional notes about the seeds behaviour
The role seed, will insert one role in the DB. Named IsAdmin. Said role will be used to access the Admin feature of the server. Change the name as per your need, but remember to also take a look at the Authorization method of the controllers to replace it as well.
The user seed will insert three default users in the database. Alice & Bob with password Pass123$, and admin with password Pwd12345!. Remember to modify this password in the future.
The configurational seed will use the information found in the config.cs to produce the first set of data. Customize it per your need !
Discovery of the UI
Now that the preparation is done. I’m gonna walk you through the interface and the features you can access.
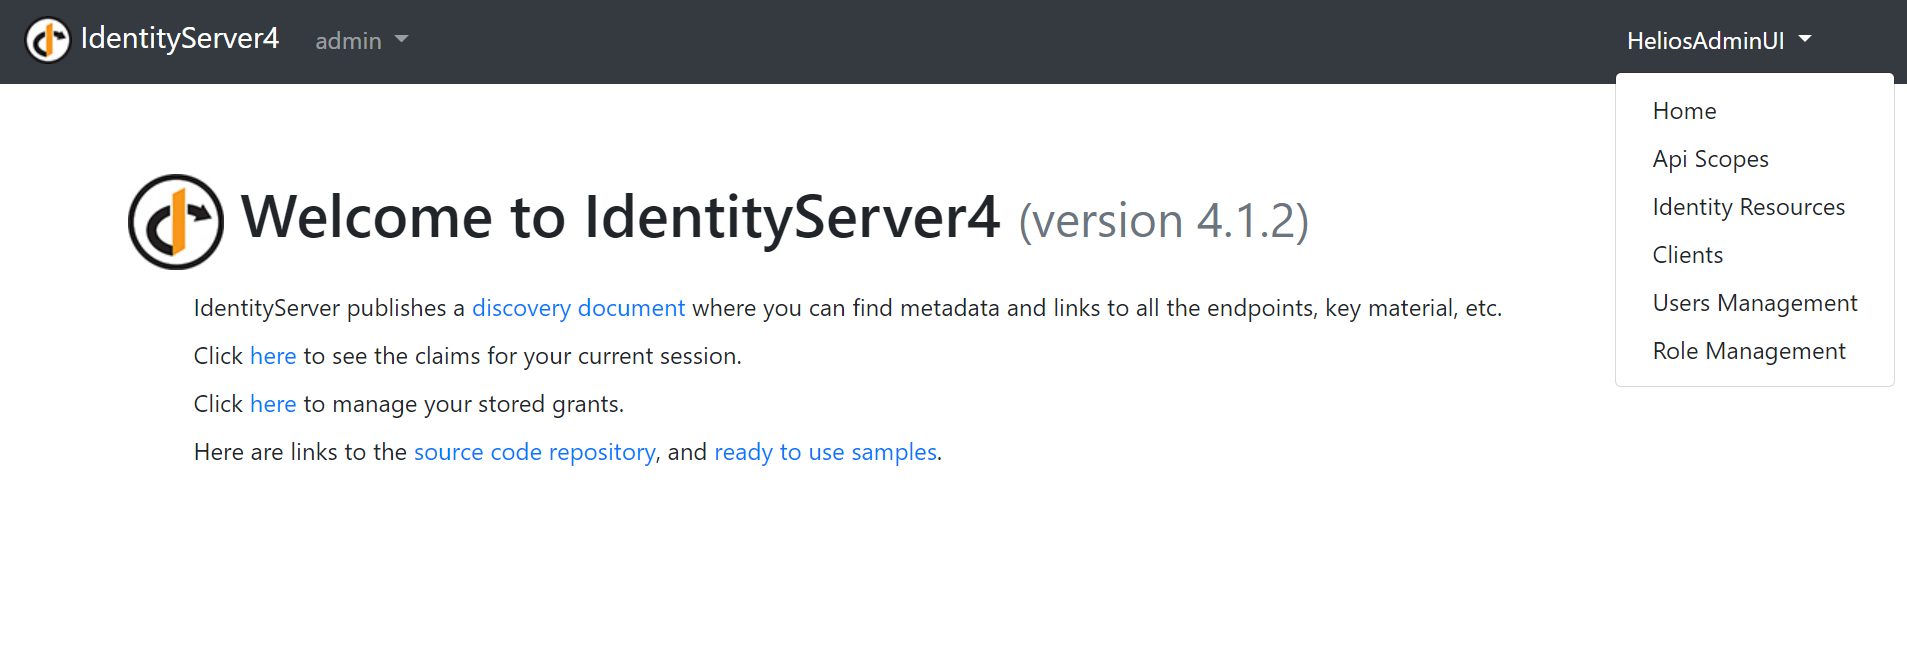
First we’ll have to login with the admin account. If the login is successful, in the upper right corner of the navigation bar you should see a new dropdown:
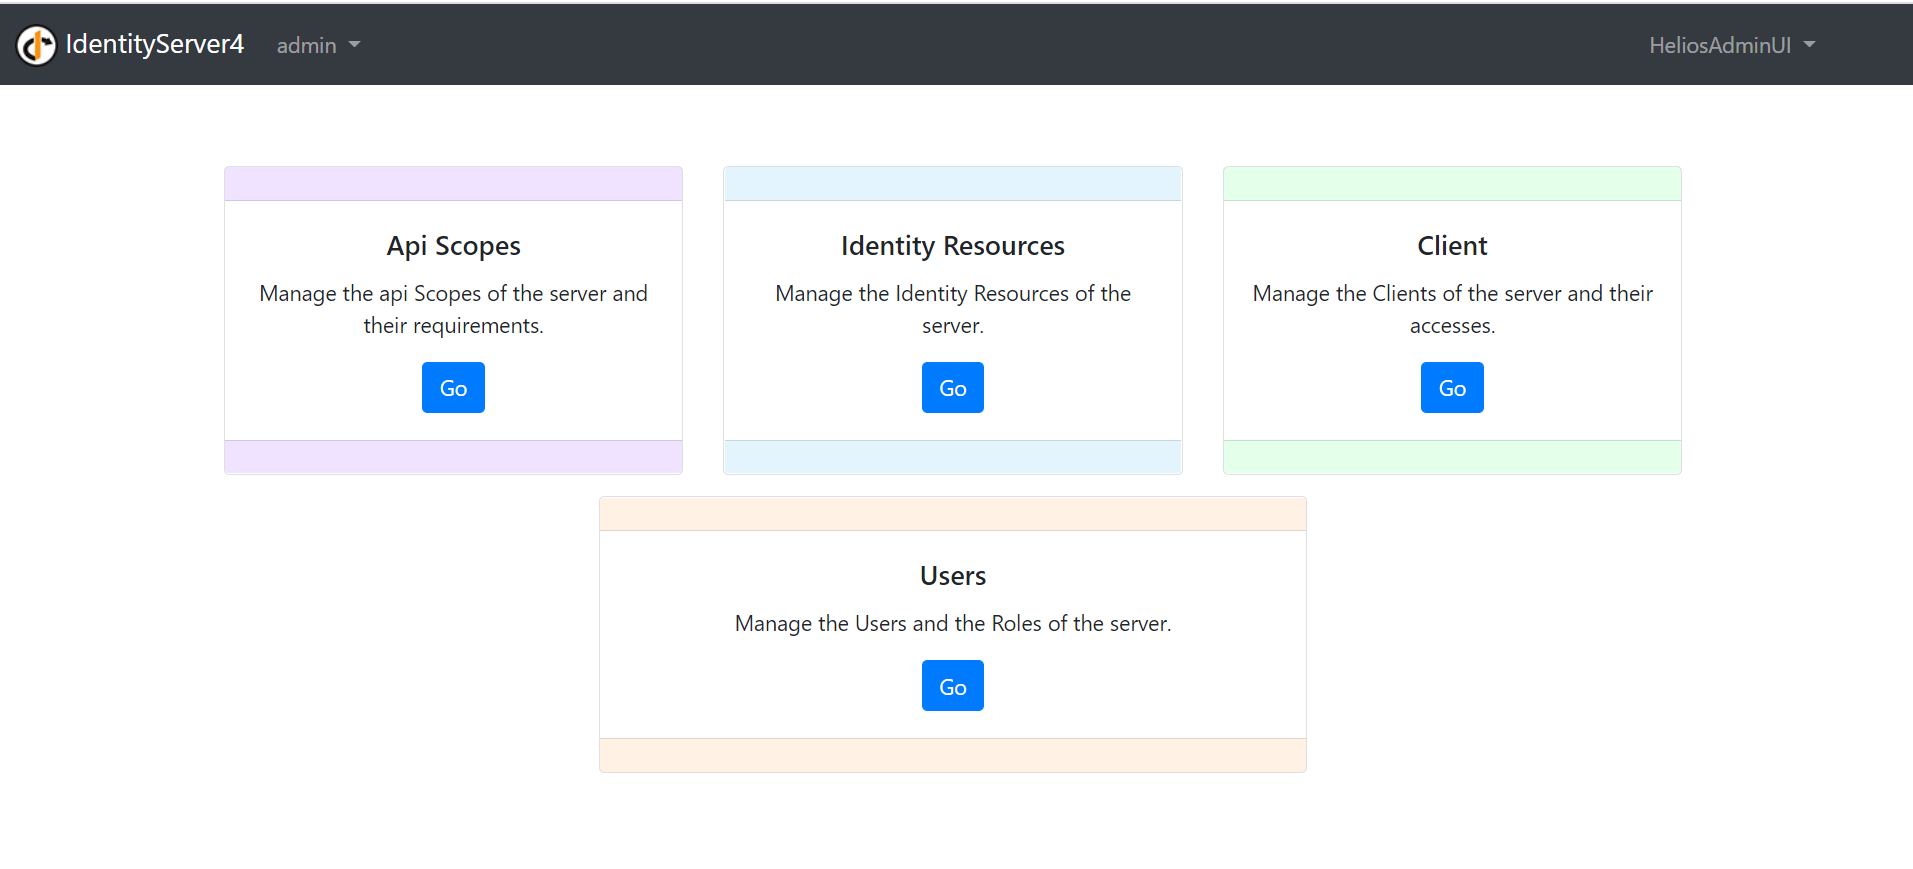
We are first going to access the home page:
I think the page itself is pretty self-explanatory. The four main management themes of the app are here. Let’s begin with the Api Scopes management now, shall we?
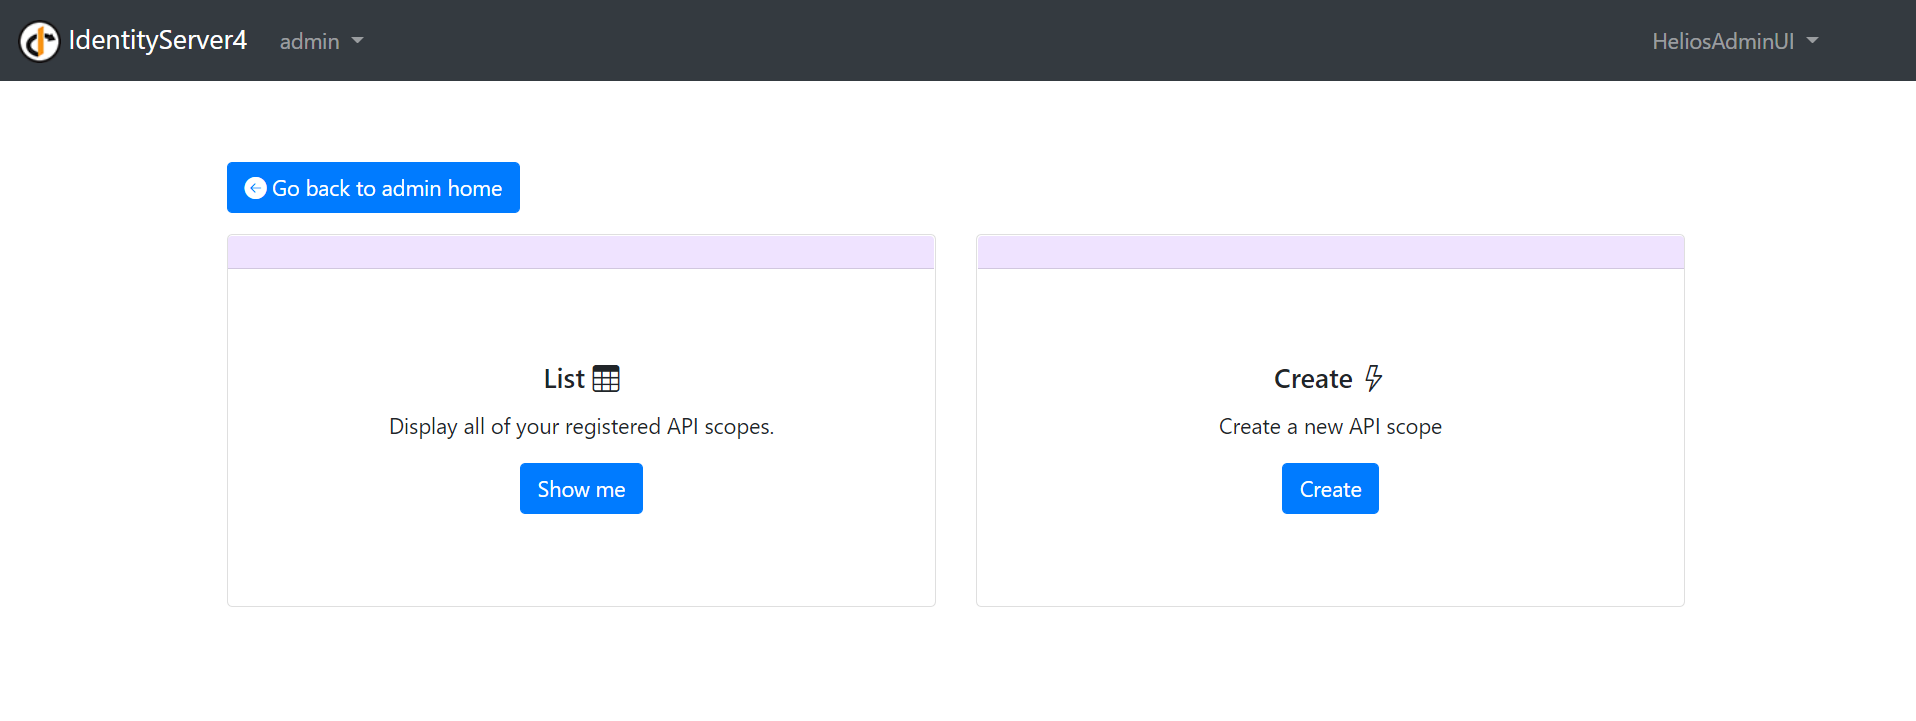
1 – Api Scopes
All of the sections presented above, when clicked, will take you to a page with two choices. Choice 1, show me my resources. Choice 2, let me create a new one.
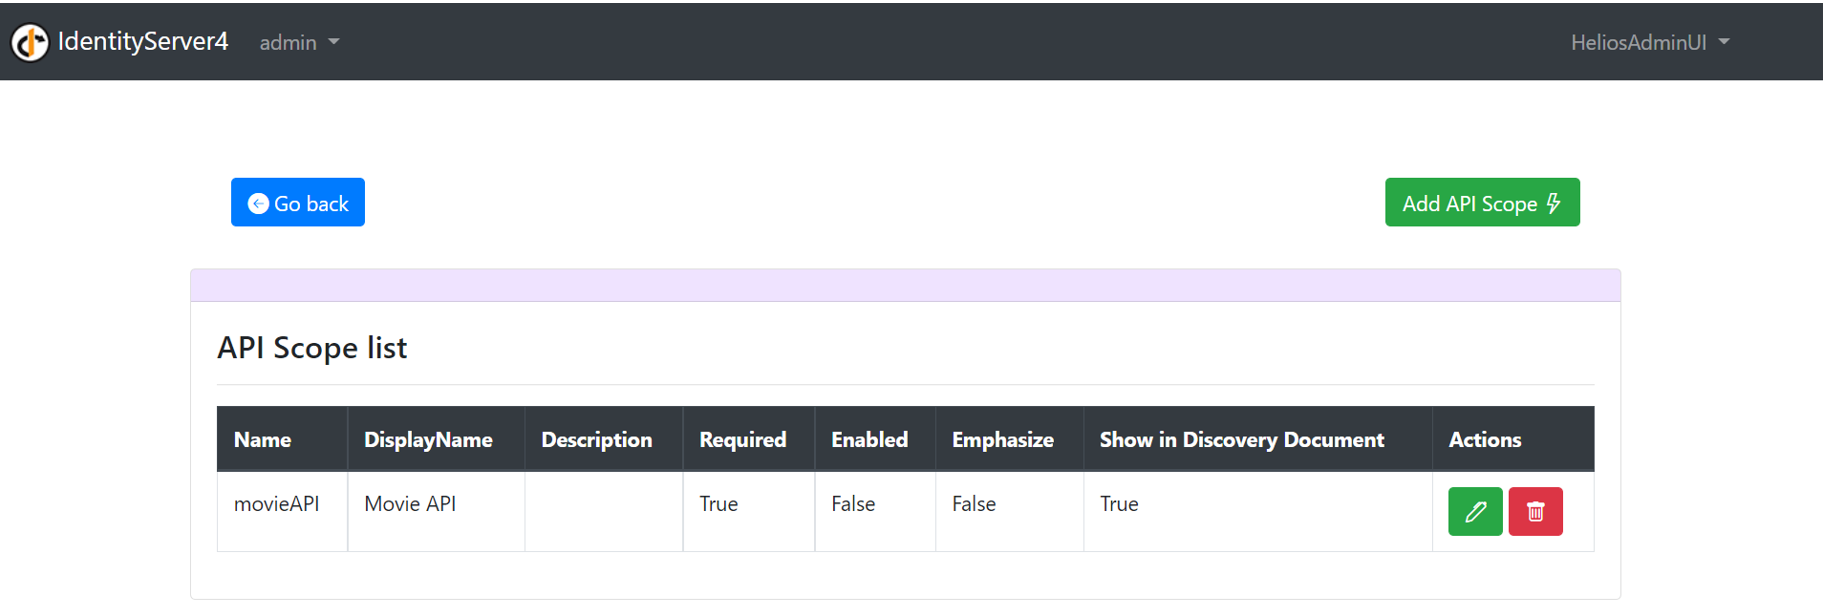
A – The List
Would you choose to access the List, you will be taken to a page letting you see you resources along with the major fields defining it.
Three options are also given here: Create, Update and Delete. Following the basics of a CRUD implementation.
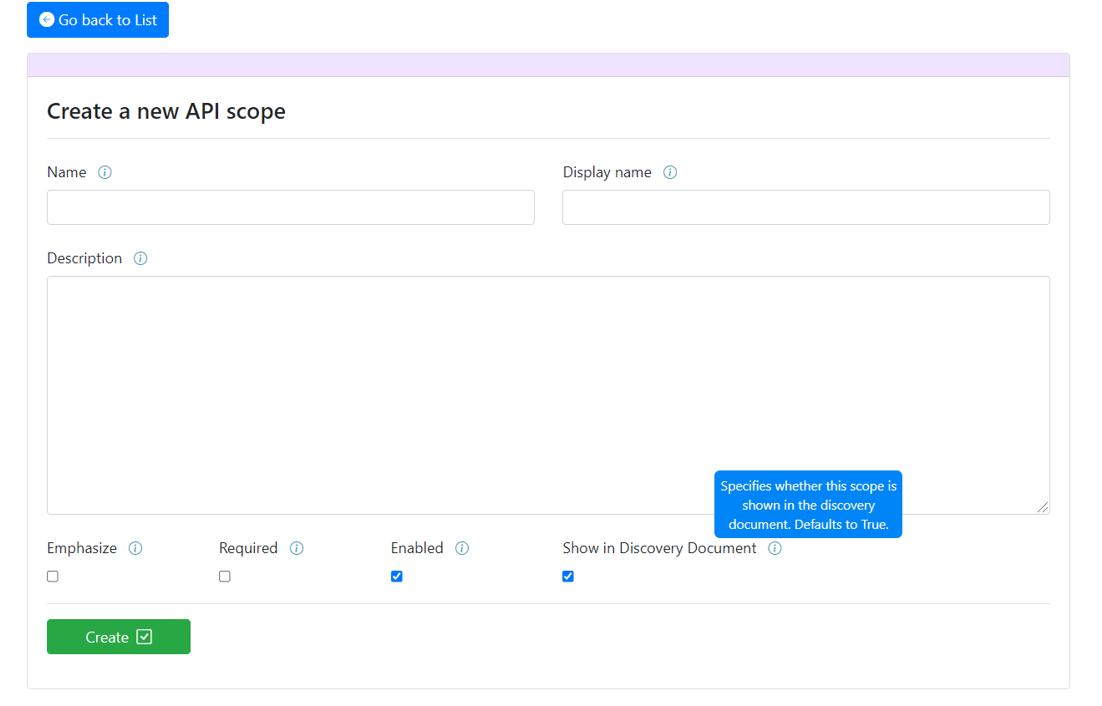
B – The Creation
When choosing to create a new resource, you will be taken to a form letting you specifies the configuration you wish for you resource.
Along with it, as displayed in the image below, some usefull information about the fields can be accessed by hovering the “(i)” icons following the labels:
Upon valid creation, you will be prompted with a validation message:
C – The Update
On the displayed list of your resource, if you choose to click on the green pen icons in the “Actions” column, you will be taken to a view similar to the one displayed above. The only difference being that the fields will be pre-populated with your past choice. Modify them at will and validate your choice by clicking on the “Update” button.
Your will, once again, be prompted with a validation message.
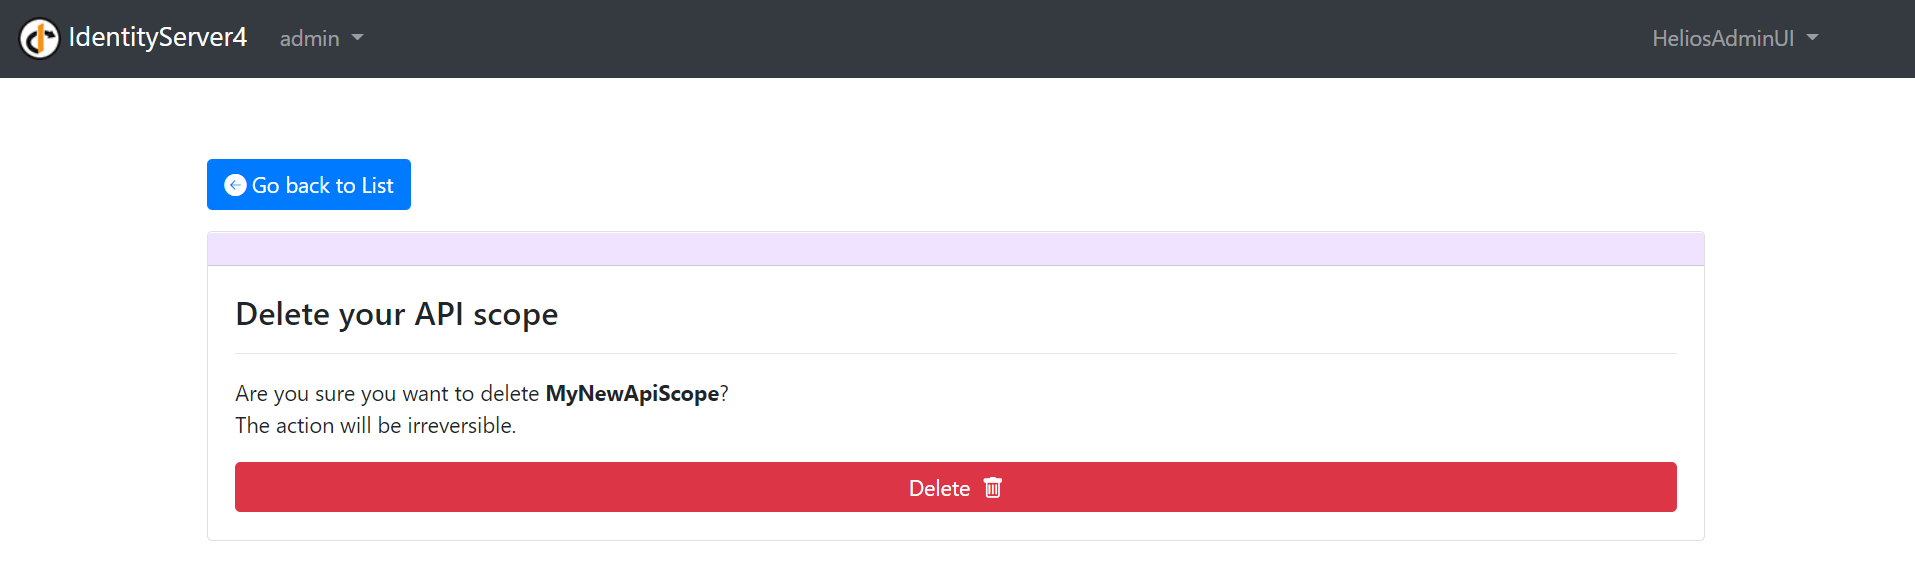
D – The Deletion
On the displayed list of your resource, if you choose to click on the red bin icons in the “Actions” column, you will be taken to the view below, asking you to validate your wish to delete this resource a second time:
Once done, and as always, a validation message will be prompted to you.
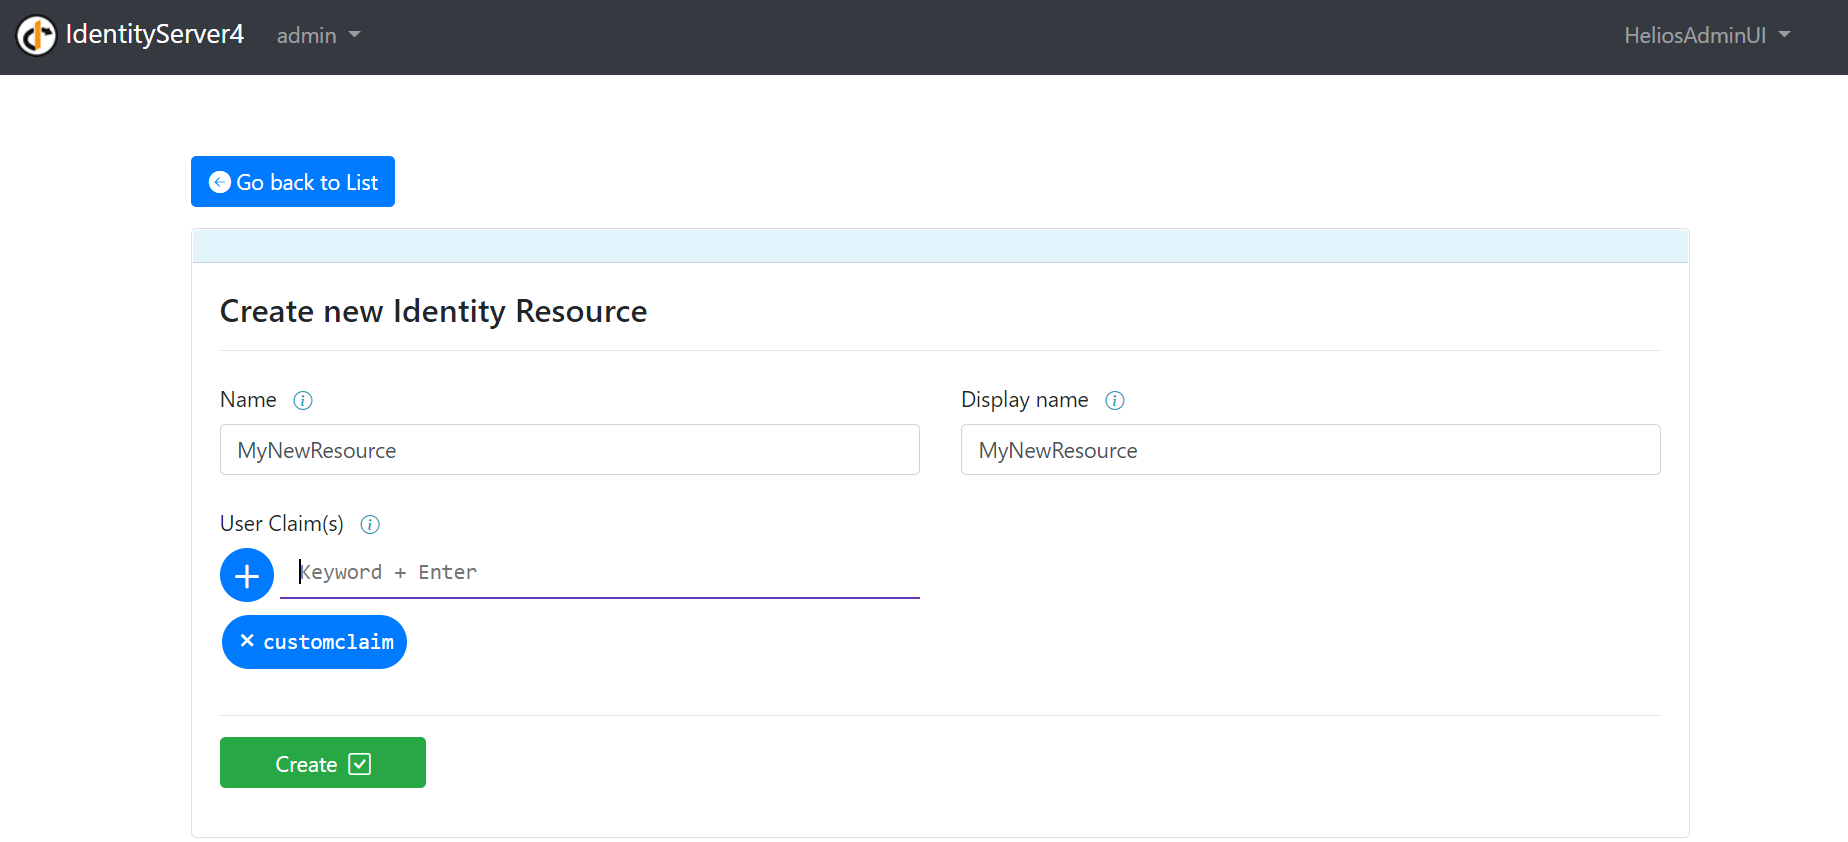
2 – Identity Resource
The management of the Identity Resources mostly follow the same flow. Only difference being in the create method. In order to create the claim for your Identity resource, you are given the ability to create and/or remove tags representing the desired claims. To add one, type in the corresponding bar and press “Enter”. To remove it, click on little arrow being part of the tag.
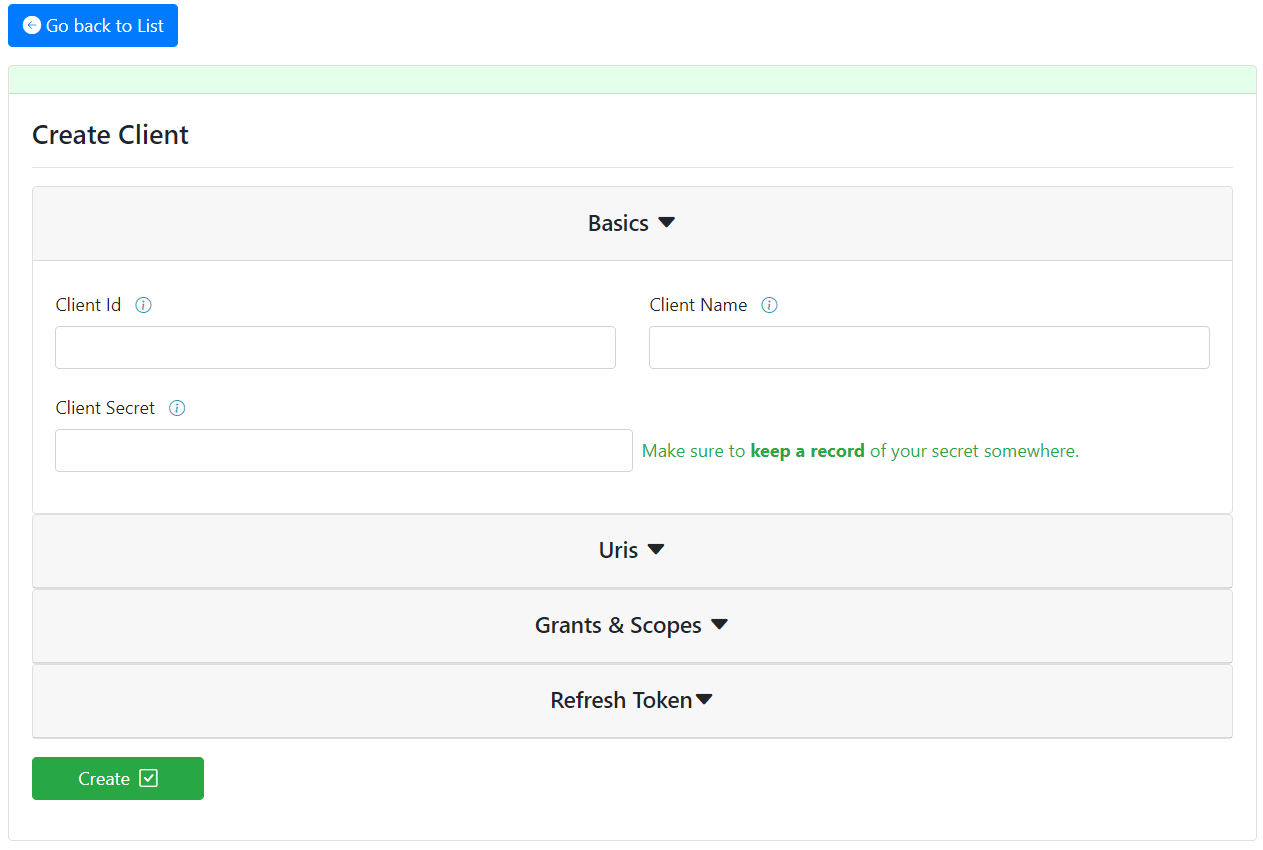
3 – Clients
The flow is once more mostly similar, the difference being again in the create method.
The form is splitted in three main sections. The first one, being, the “Basic” one lets you define your Id, Name and Secret for this Client. As written in the picture bellow, take note of the Secret you will wish to define, as it won’t be available anywhere else later.
The second section lets you define the URIs used by the client:
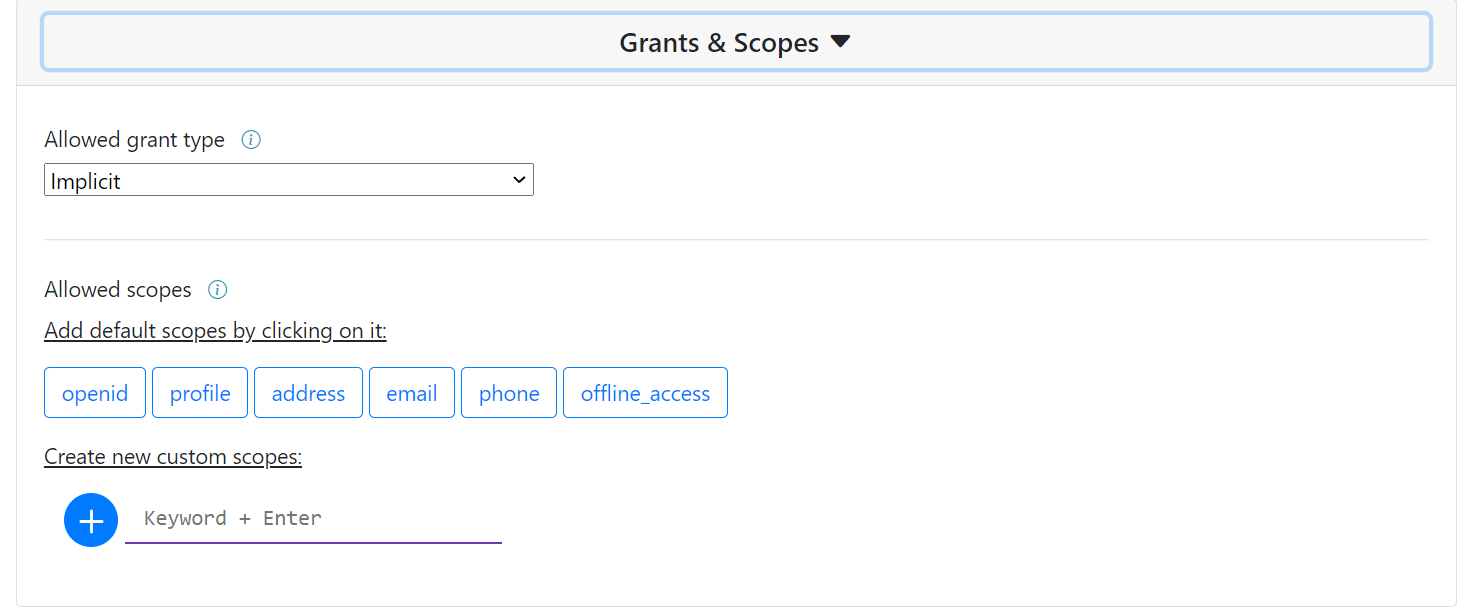
The third lets you define the Grants and Scopes of your Client.
The grant types correspond to the default one provided by the IdentityServer Documentation. The clickable Scopes are also based on the default ones of the documentation.
Finally, for a more customizable approach, you can create your own custom scopes.
The fourth and final section let’s you manage the way your application deals with token expiracy and refresh token. Do I want a refresh token mechanism to be impletemented? Should it update the relatives claims on update? How long do I want the access token to be valid? All that can be dealt with right here.
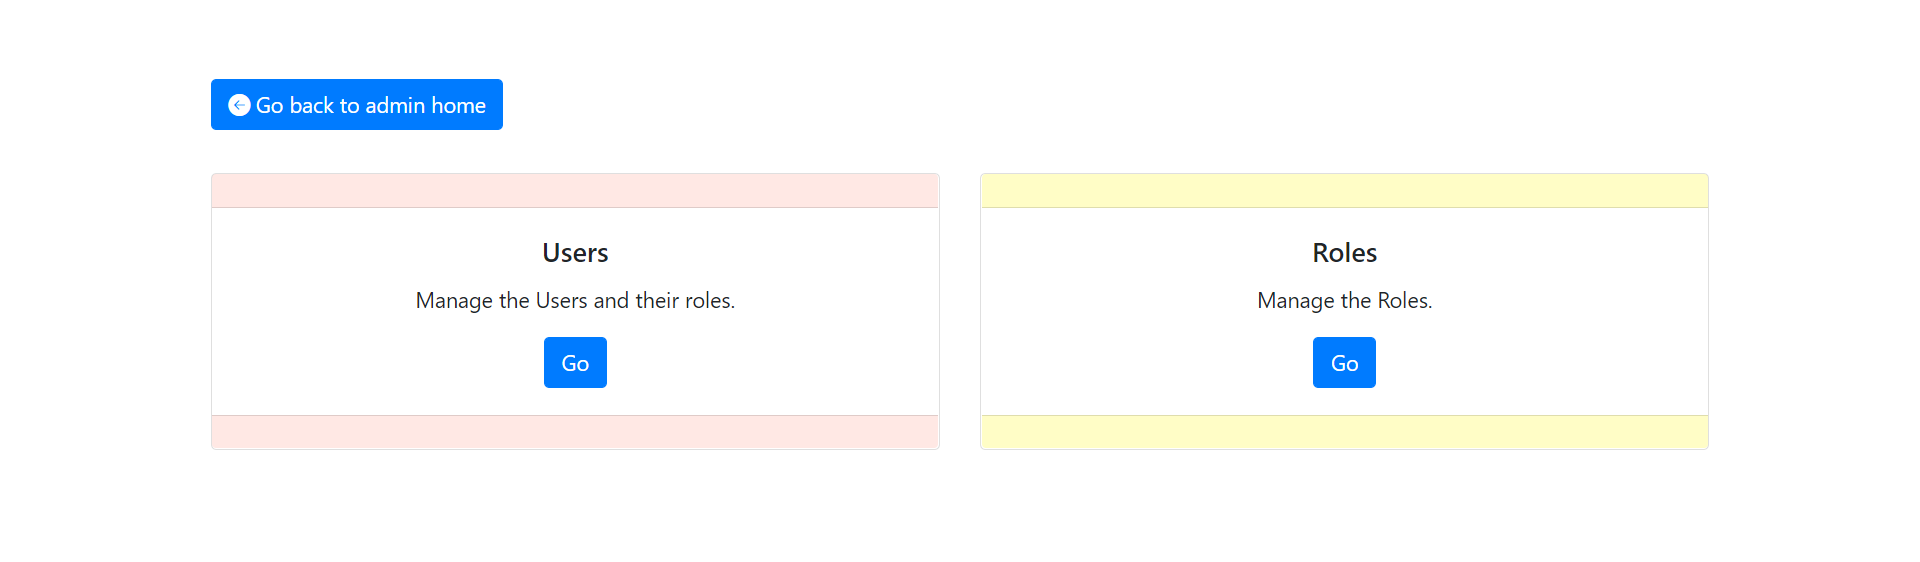
4 – Users & Roles
We are Lastly going to discuss the about how to manage your Roles and Users on the server.
From the Admin home page, if you decide to click on the last section, you will taken to a menu offering you two choices:
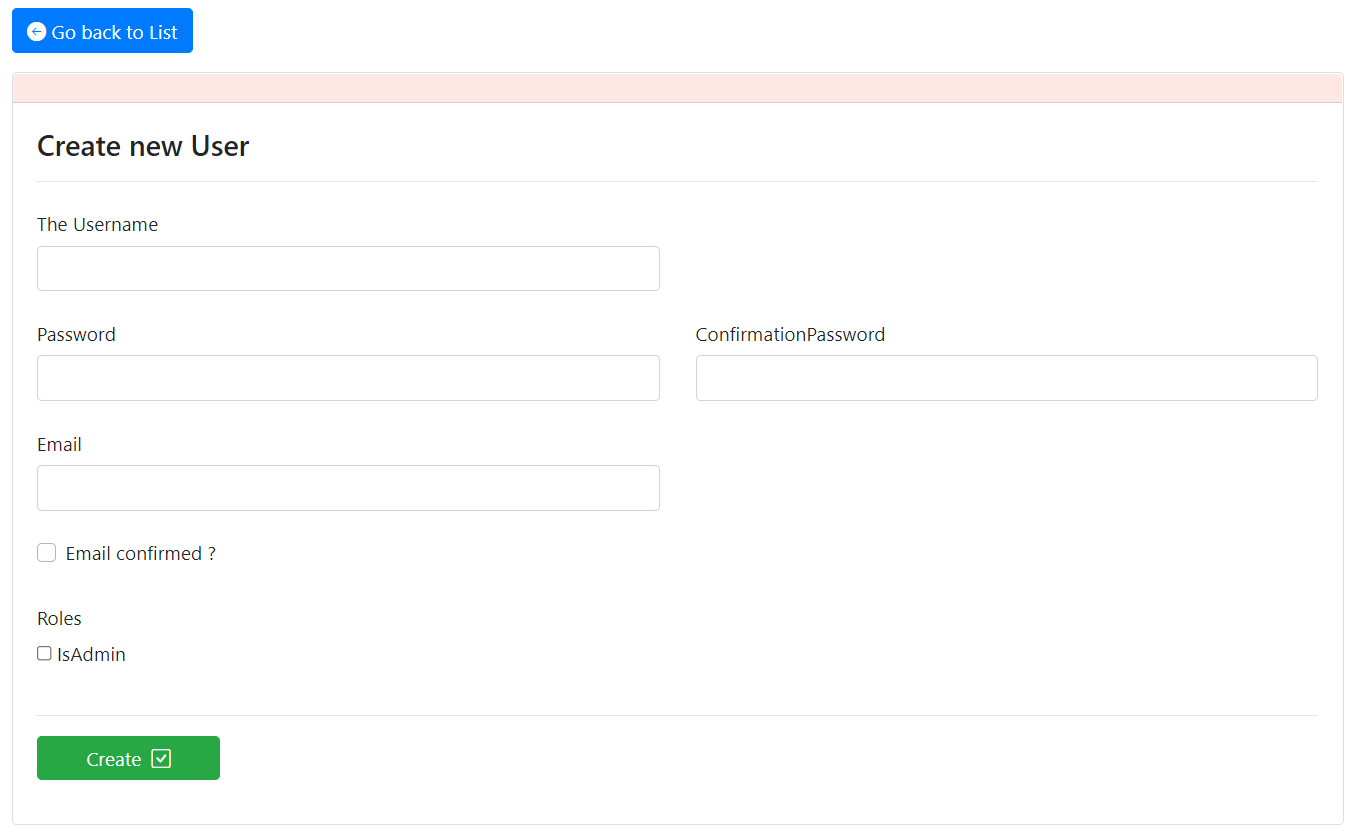
The User section will give you the capacities to create new user without the need of a proper flow following the Register method. You will also have the ability to add your newly created user to the roles you built on your server. It goes without saying that you will be able to update and delete those users as you wish.
Below, a caption of the User creation form:
And finally, the Role section. Three possibilities are also given to you here. Creating new roles, Listing them, and deleting them.
The newly created Roles, will be automatically added to the list of choices you can access upon the creation of a new user.
Final Thought
If you went down as far a this line, I would like to thank you for your attention. This project represents hours of work and head scratching. I know it’s not perfect and there are still a good amount of work to be done, but I hope it might be usefull to some of you.
The Python script is the backend of a Kivy-based application that manages user data using a MongoDB database. It includes login, password management, and registration functions, using bcrypt for password hashing. The application uses Kivy’s ScreenManager for navigation and uses toast messages for user feedback. The main.kv file contains the Kivy Language markup for the user interface.
The Python script is the backend of a Kivy-based application that interfaces with a MongoDB database for user management tasks. It includes functionality for login, password management, and registration, using bcrypt for password hashing. Multiple screens are defined for user interaction, using Kivy’s ScreenManager for navigation. The application also incorporates notifications using toast messages for user feedback. The main.kv file contains the Kivy Language markup for the user interface, which typically defines layout, widgets, and styling of an app, binding to Python logic.
Features
The Python script serves as the backend for a Kivy-based application, ensuring smooth user interactions, secure authentication, and effective communication with the MongoDB database. It interfaces with a MongoDB database to handle user management tasks. The application offers login functionality, password management, and registration for users. Security measures include bcrypt password hashing and storage. The application defines multiple screens for user interaction and uses Kivy’s ScreenManager for efficient navigation. User feedback is provided through toast messages, enhancing the user experience. The main.kv file contains Kivy Language markup, defining the layout, widgets, and styling of the app’s user interface, bound to Python logic for a cohesive user experience. This Python script forms the backbone of the Kivy-based application, ensuring secure authentication and effective communication with the MongoDB database.
Initialize your local Git repository by opening a terminal or command prompt, navigating to your project directory, and initializing the repository with git init.
Connect your local repository to GitHub by copying the URL of your GitHub repository and linking it to git remote add origin YOUR_REPOSITORY_URL.
Push your changes to GitHub by pushing your local commits to git push, updating your GitHub repository with your local changes.
Pull changes from GitHub if working with others or on multiple machines.
To manage your project with main.py and main.kv, keep both files in the same project directory, and update them regularly to ensure synchronization in version control.
Rating
The project showcases good security practices with bcrypt, structured user interface screens, and practical implementation of user management functionalities. It provides a clear, user-friendly interface corresponding to the Python script and uses a separate.kv file for UI design. However, it lacks error handling and user input validation beyond basic checks. The application’s functionality seems primarily focused on user management without clear indication of its broader purpose. The UI design adheres to user experience best practices but could improve by expanding error handling, input validation, and enhancing the UI design. The project’s direct integration with a MongoDB database is a robust choice for applications requiring user accounts and authentication.
$ go get github.com/ONSdigital/git-diff-check
# or ..
$ cd${GOPATH}
$ git clone https://github.com/ONSdigital/git-diff-check.git src/github.com/ONSdigital/git-diff-check
Then build:
$ cd${GOPATH}/src/github.com/ONSdigital/git-diff-check
$ go build -o pre-commit cmd/pre-commit/main.go
Then follow the steps in From Binary (other platforms) using your compiled binary
in place of a downloaded one
Usage
Once installed, the binary will run each time you use git commit.
If it finds things it thinks could be sensitive it will flag a warning and stop
the commit proceeding, e.g.:
$ git add questionableCode.py
$ git commit
Running precommit diff check
WARNING! Potential sensitive data found:
Found in (questionableCode.py)
    > [line] Possible AWS Access Key (line 6)

If you're VERY SURE these files are ok, rerun commit with --no-verify
NB Currently if you update the pre-commit script in your templates, you will
need to manually re-copy it into each repo that uses it.
Experimental Entropy Checking
By default, the pre-commit tool won’t use entropy checking on patch strings. If you
wish to enable this functionality, please set the DC_ENTROPY_EXPERIMENT environment
variable.
$ export DC_ENTROPY_EXPERIMENT=1
License
Copyright (c) 2017 Crown Copyright (Office for National Statistics)
Released under MIT license, see LICENSE for details.
This repository contains the R code for analyzing student peer reviews in an R class. The analysis aims to uncover insights into student engagement through the lens of textual feedback provided during peer reviews.
Installation:
To run the code provided in this repository, you will need R installed on your machine along with the following R packages:
–haven
–dplyr
–tidytext
–textclean
–syuzhet
–ggplot2
–readxl
–tm
–and udpipe
You can install these packages using the following command in your R console:
install.packages(c(“haven”, “dplyr”, “tidytext”, “textclean”, “syuzhet”, “ggplot2”, “udpipe”, “readxl”, “tm “))
Usage:
Clone or Download: Clone or download this repository to your local machine.
Install Packages: Install the required R packages listed in the Installation section if you haven’t already (refer to the above command).
Prepare Dataset: Ensure you have an Excel file formatted according to the dataset structure described below. Update the filepath variable in the scripts with the path to your dataset file
filepath <- “path/to/your/Undergraduate2022-2019.xlsx” # Replace with the actual path to your dataset
Data:
The dataset required for running this code consists of 11 columns and 439 rows, including student final grades in the class, assignment grades, student comments on peer work, and a breakdown of rubric scores. No sample data is provided.
The structure of the dataset is as follows:
–Grade Received on Assignment
–Overall Grade in the Class
–Review Comments Given
–Overall
–The Statistics Contribution
–Code
–Documentation
–Testing
–Style
–Organization
–Accessibility
Contributing:
We welcome contributions to this project! If you have suggestions for improvements or have found bugs, please let us know.
License:
This work is distributed under the GPL license. This allows you to freely copy, modify, and distribute the code for personal use. However, if you publish modified versions or bundle it with other code, the modified version or complete bundle must also be licensed under the GPL.
The repository contains a novel implementation for Topic Extraction.
In short:
Over the last years the necessity to automatize information retrieval from texts has been growing considerably as part of media digitization. The emerging flow of data requires efficient techniques in the field of Natural Language Processing (NLP), such as Keyword Extraction (KE) algorithms among many others. Unfortunately, languages with a small number of speakers like Nordic languages have to face a lack of resources that weighs down the potential benefits of NLP applications.
This thesis introduces a novel KE model for topic extraction that follows an unsupervised hybrid approach making use of statistical and linguistic text features, such as syntactic analysis within sentences, entity recognition, word frequency and position in the text, or semantic similarity. The model can be easily configured to predict keyphrases for different KE scenarios and it is able to make predictions for English, Danish, Swedish and Norwegian. The novel algorithm has shown a competitive performance compared to other state-of-the-art unsupervised KE methods, being evaluated using 7 annotated datasets with texts in four different languages.
The report provides a research of the current state of the art KE for Scandinavian languages and suggests to consider KE not as a final step but a initial or complementary phase for other NLP tasks. The proposed implementation can be used for document retrieval in many NLP applications, such as topic clustering, summarization or data visualization.
Functionality
For the moment the Python package allows to perform 2 operations:
Predict keywords and save the results in a CSV file.
Evaluate predicted keywords with human-annotated keywords.
The Insyra library is a dynamic and versatile tool designed for managing and analyzing data in Go. It offers a rich set of features for data manipulation, statistical calculations, data visualization, and more, making it an essential toolkit for developers handling complex data structures.
Tip
We got brand new isr package, which provides Sytax Sugar!
Any new project is recommended to use isr package instead of calling insyra main package directly.
For more details, please refer to the Documentation.
Note
If some functions or methods in the documentation are not working, it may be because the feature is not yet included in the latest release. Please refer to the documentation in the source code of the corresponding version in Releases.
Important
For any functions or methods not explicitly listed in Insyra documents, it indicates that the feature is still under active development. These experimental features might provide unstable results.
Please refer to our latest updates in Docs folder for more details.
The DataList is the core structure in Insyra, enabling the storage, management, and analysis of dynamic data collections. It offers various methods for data manipulation and statistical analysis.
For a complete list of methods and features, please refer to the DataList Documentation.
The DataTable structure provides a tabular data representation, allowing for the storage and manipulation of data in a structured format. It offers methods for data filtering, sorting, and aggregation, making it a powerful tool for data analysis.
You can also convert between DataTables and CSV files with simply one line of code, enabling seamless integration with external data sources.
Insyra features a powerful Column Calculation Language (CCL) that works just like Excel formulas!
With CCL, you can:
Create calculated columns using familiar Excel-like syntax
Reference columns using Excel-style notation (A, B, C…)
Use conditional logic with IF, AND, OR, and CASE functions
Perform mathematical operations and string manipulations
Execute chained comparisons like 1 < A <= 10 for range checks
// Add a column that classifies data based on values in column Adt.AddColUsingCCL("category", "IF(A > 90, 'Excellent', IF(A > 70, 'Good', 'Average'))")
// Perform calculations just like in Exceldt.AddColUsingCCL("total", "A + B + C")
dt.AddColUsingCCL("average", "(A + B + C) / 3")
// Use range checks with chained comparisons (try this in Excel!)dt.AddColUsingCCL("in_range", "IF(10 <= A <= 20, 'Yes', 'No')")
For a complete guide to CCL syntax and features, see the CCL Documentation.
For a complete list of DataTable methods and features, please refer to the DataTable Documentation.
Packages
Insyra also provides several expansion packages, each focusing on a specific aspect of data analysis.
Offers parallel processing capabilities for data manipulation and analysis. Allows you to execute any function and automatically wait for all goroutines to complete.
Provides a super simple and intuitive way to generate linear programming (LP) models and save them as .lp files. It supports setting objectives, adding constraints, defining variable bounds, and specifying binary or integer variables.
Execute Python code in Go without manually installing Python environment and dependencies. Allows passing variables between Go and Python.
Advanced Usage
Beyond basic usage, Insyra provides extensive capabilities for handling different data types and performing complex statistical operations. Explore more in the detailed documentation.
Contributing
Contributions are welcome! You can contribute to Insyra by:
Issues: Reporting issues or suggesting new features.
Pull Requests: Submitting pull requests to enhance the library.
Discussions: Sharing your feedback and ideas to improve the project.
Contributors
License
Insyra is licensed under the MIT License. See the LICENSE file for more information.


 https://github.com/edwarddramirez/derivative-tinygp